
What is SFTP?
SFTP, or Secure File Transfer Protocol, is a network protocol that provides file access, file transfer, and file management over any reliable data stream. Because of its secure shell encryption, SFTP provides a high level of security for sending and receiving file transfers.
SFTP is similar to FTPS in that it uses AES and other algorithms to secure data as it travels between different systems. It also provides several methods to fulfill the authentication of a connection. This protocol assumes that it is run over a secure channel, such as SSH, that the server has already authenticated the client, and that the identity of the client user is available to the protocol.
SFTP is capable of helping enterprises achieve file transfer compliance as required for HIPAA, GDPR, and other regulatory regimes.
To use SFTP, SFTP client software is required to connect to an SFTP server, where files can be uploaded, stored, and retrieved in a downloadable format. An SFTP server is the type of storage location where files are stored and retrieved.
How to connect to SFTP
Setup requirements
In order to set up SFTP in SageData, you will need:
| File types |
|
| First-row header |
|
| Delimiters |
|
| Compression types | In order to avoid errors during extraction, files must be correctly compressed
|
| Character encoding | UTF-8 |
Step 1: Whitelist SageData’s IP addresses
If access to your server is restricted by a firewall, you will have to list SageData’s IP address.
Step 2: Configure SSH for the SFTP server
Configure a SSH via key-pair authentication in order to use SFTP integration. If you decide not to configure key-pair authentication, SageData will be able to connect by using username and password authentication.
Note: This is an optional step, only if the log into the SFTP server requires key-pairs. Alternatively, you can use a password for username/password authentication.
Step 2.1: Add the public key to authorized_keys
On your server, add the public key under the authorized_keys file on your server. This way SageData will be able to authenticate via a public key and connect to the server.
- Log into your SSH server by opening a new terminal window.
- Create the
.sshdirectory (in case it doesn’t exist for the user you are trying to log in):mkdir ~/.ssh - Change the permissions of the directory and to allow access by using the
chmod:chmod 700 ~/.ssh - Navigate to the
.sshdirectory:cd ~/.ssh
- Using
touch, create theauthorized_keysfile:touch authorized_keys - Set the permissions for
authorized_keys:chmod 600 authorized_keys - Import your public key into
authorized_keysby replacing<PUBLICKEY>with your public key. Verify after replacing the key that it is on one line and doesn’t contain line breaks:echo "<PUBLIC KEY>" >> ~/.ssh/authorized_keys
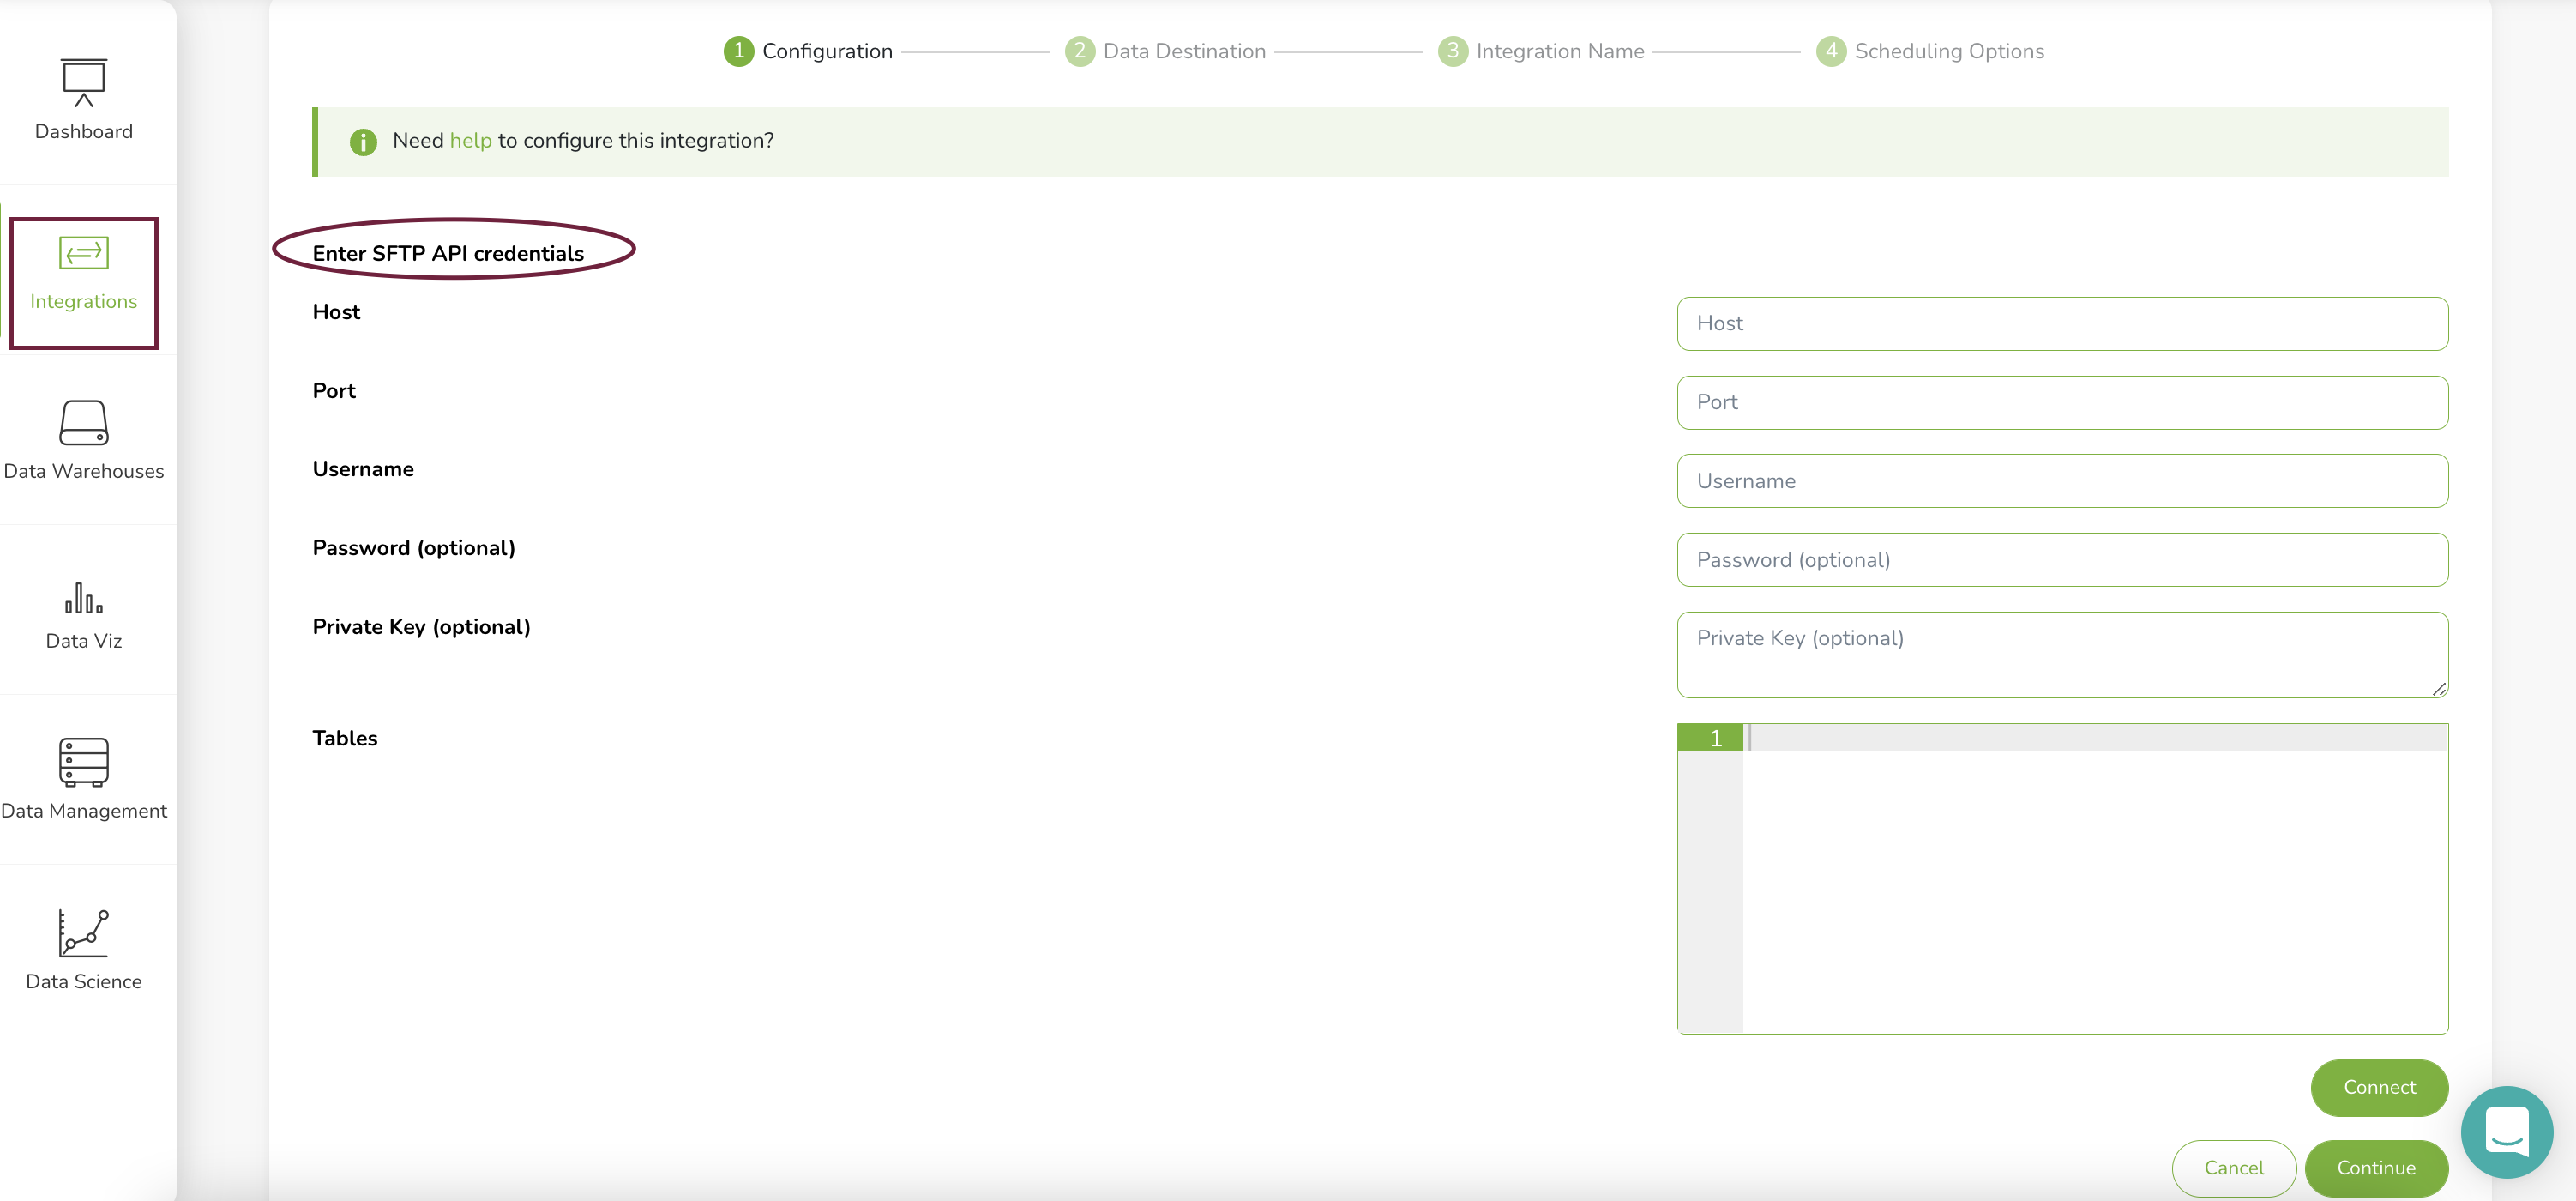
Step 3: Add SFTP as a SageData source
- Login to your SageData account.
- On the left sidebar go to ‘Integrations’ and select ‘+New Integration’

- Search for the SFTP integration using the search bar
- Fill in the fields as follows:
Step 4: Tables configuration
You will have to define the files on your SFTP server from which data should be replicated. Use the search_pattern and search_prefix to easily find the file.
Define table name
Give 'table_name' to your table. Beware that each destination has different naming conventions. For example: Amazon Redshift table names can’t exceed 127 characters.
Limit search by adding directory prefix
You can also add "search_prefix" which will point to the directory where the search should start. If there are children-directories, you can point to the exact destination, where the file is at.
"search_prefix": "customer/results/"
Seacrh_Pattern definition
The search_pattern key-pair defines the criteria which SageData is going to use to find and select the files for replication. Keep in mind that:
- if more than one files has to be found and replicated – all files must have the same header row values
search_patternsare important for how data in files is updated. Example:
| Scenario | Single file, update regularly | Multiple files, daily generation |
| Type of update | File is updated regularly, with new campaign data | New file is created every day, which contains new data. Old files stay the same |
| File name | campaign.csv | campaign-[string].csv ([string] is a unique, random string) |
| Search_pattern | use the key-pair
for exact match | use the key-pair
to match all files starting with campaign |
Define the table’s Primary Key
As "key_properties" you will define the values that are unique and can be used as primary key for the table. If there should be more than one primary key add them as an array separated by comma:
"key_properties": ["id", "date"]
Define the delimiter
Define the special character that separates the data in your file into distinct fields. Example:
"delimiter" : ","
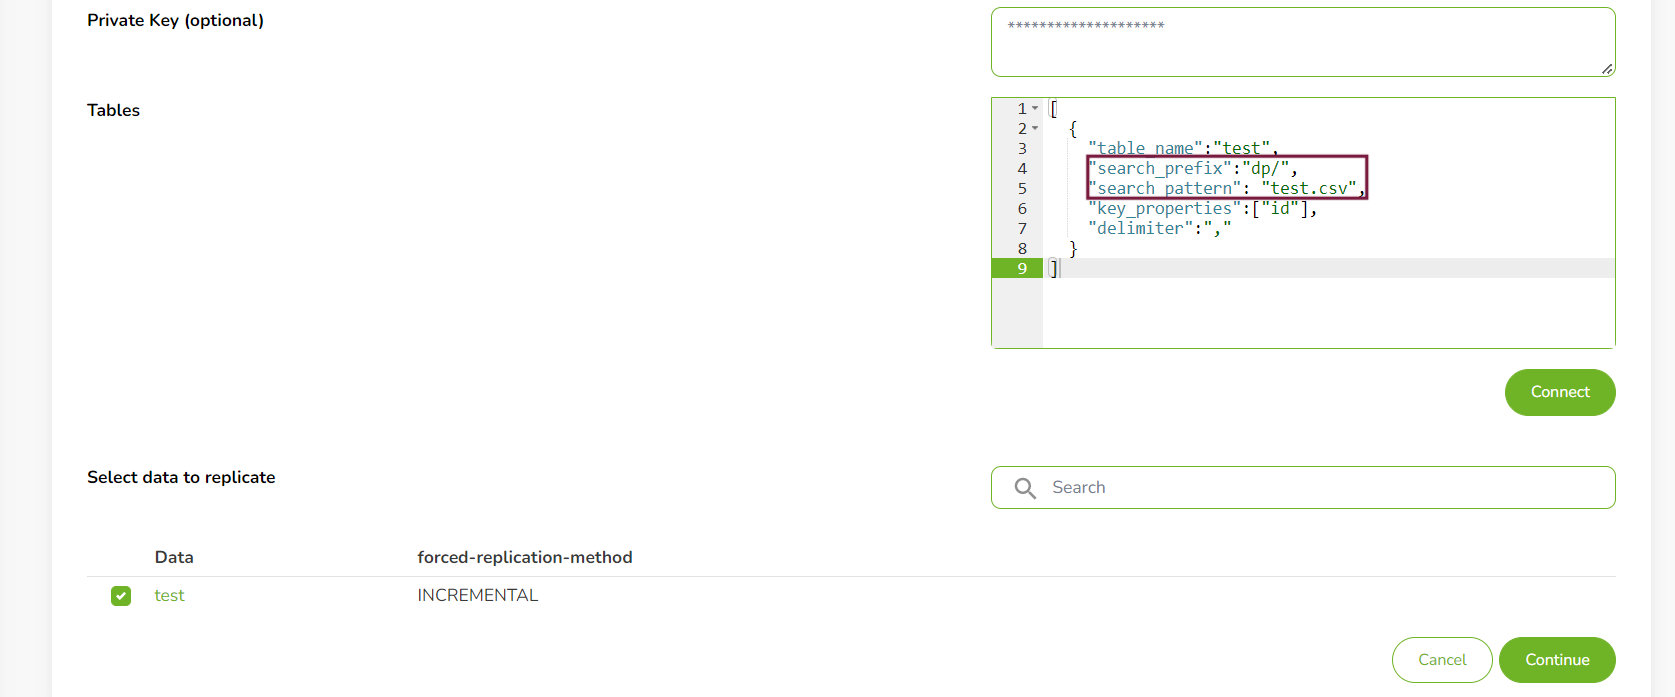
After you have defined the table, click ‘Connect‘. SageData will connect to your SFTP server and locate the file based on the criteria you entered. A list of suggestions will be shown. Select the file you want to replicate.
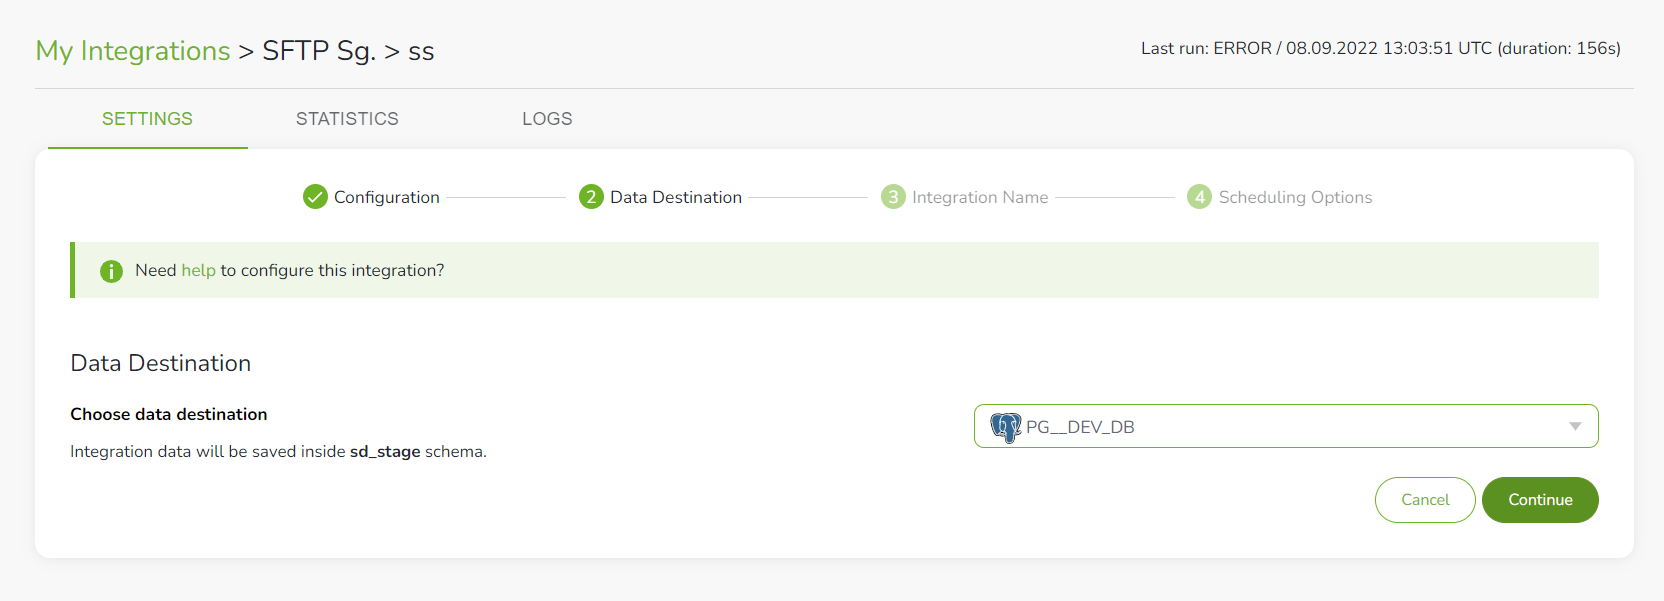
Step 5: Select data destination
Select a destination for the data you want to replicate. You will see a drop-down list of all configured destinations for your account.
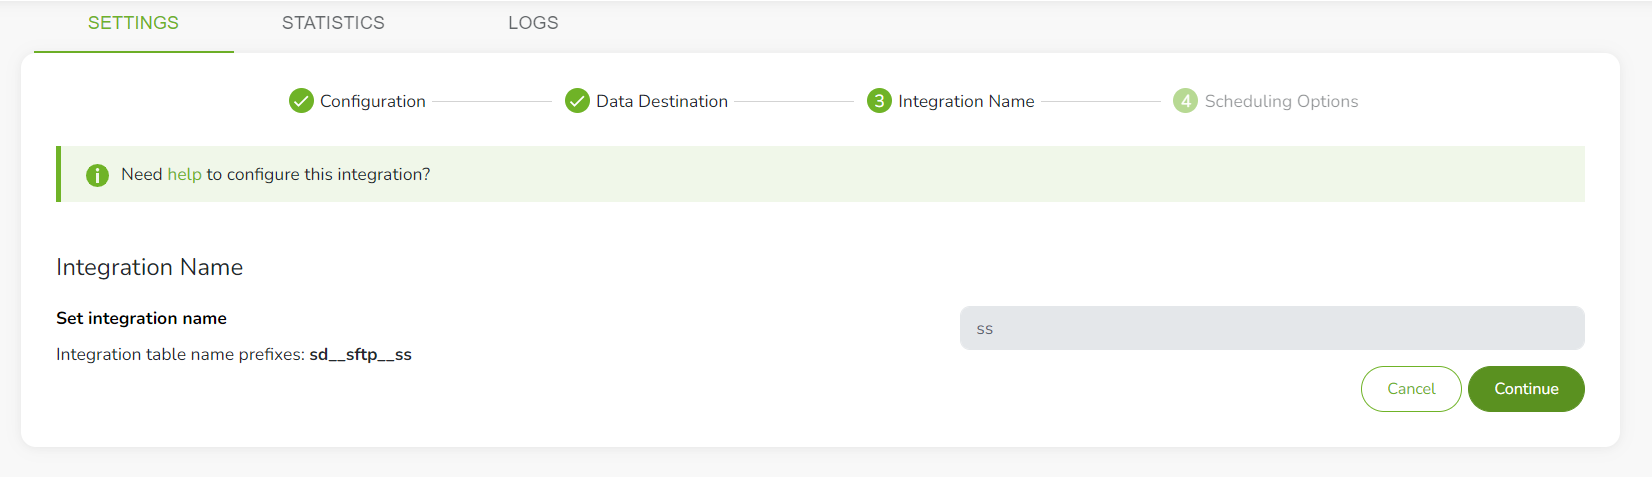
Step 5: Integration name
Give a name to your integration.
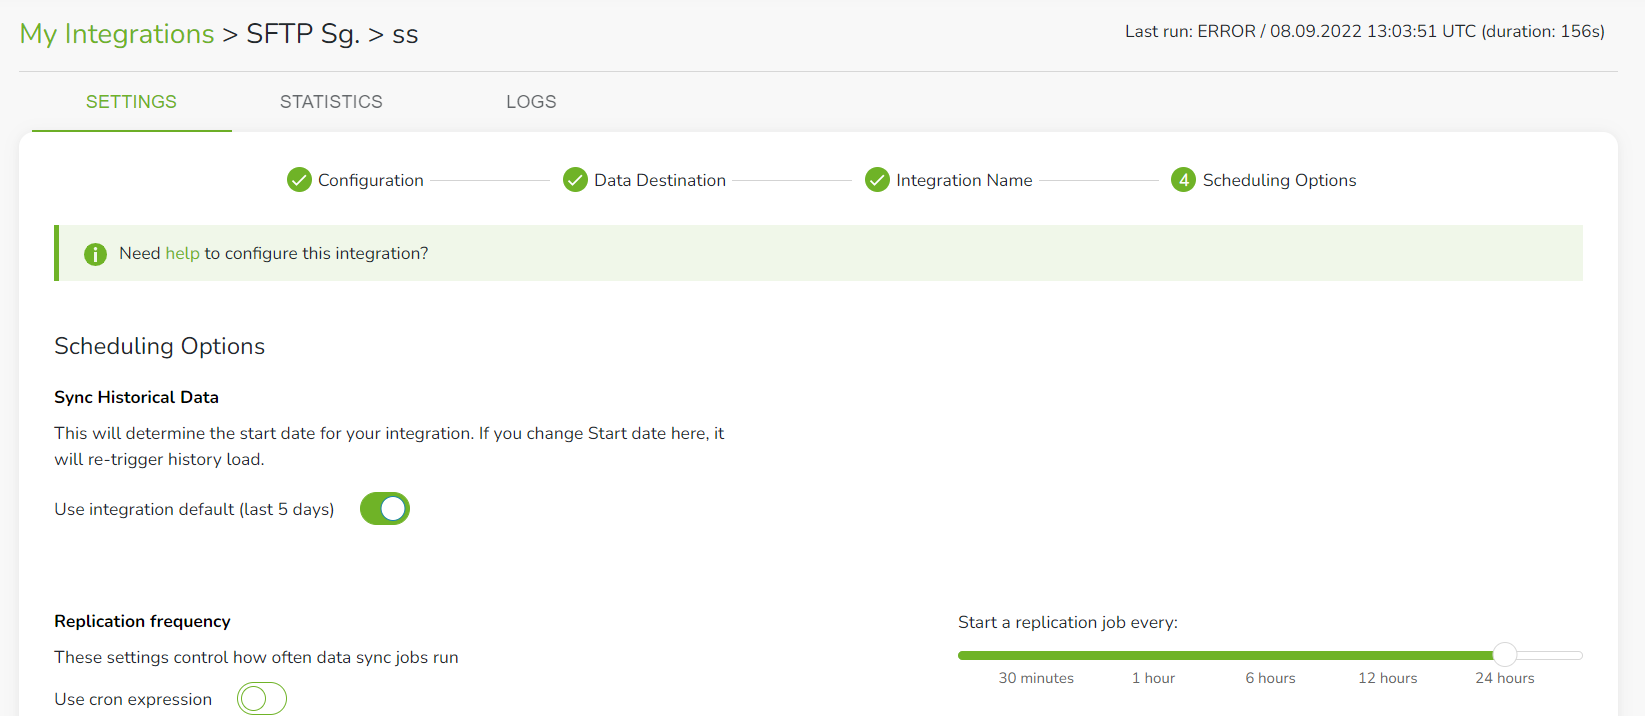
Step 6: Create a replication schedule
In this step you’ll create the integration’s replication schedule. This will determine how often SageData will run a replication job, and the time that job begins.
SageData is offering few methods for creating your replication schedule:
- Sync historical data
- Replication Frequency
- Replication frequency and anchor time
- Scheduling using CRON expressions
After you have finished with definition of the replication schedule and save the integration settings, SageData will start extracting data from the file on your SFTP server and save it to the defined destination. The replication of data will run based on the defined schedule of the integration.